
How to Choose Himalayan Salt Tiles and Bricks for Your Wall Project

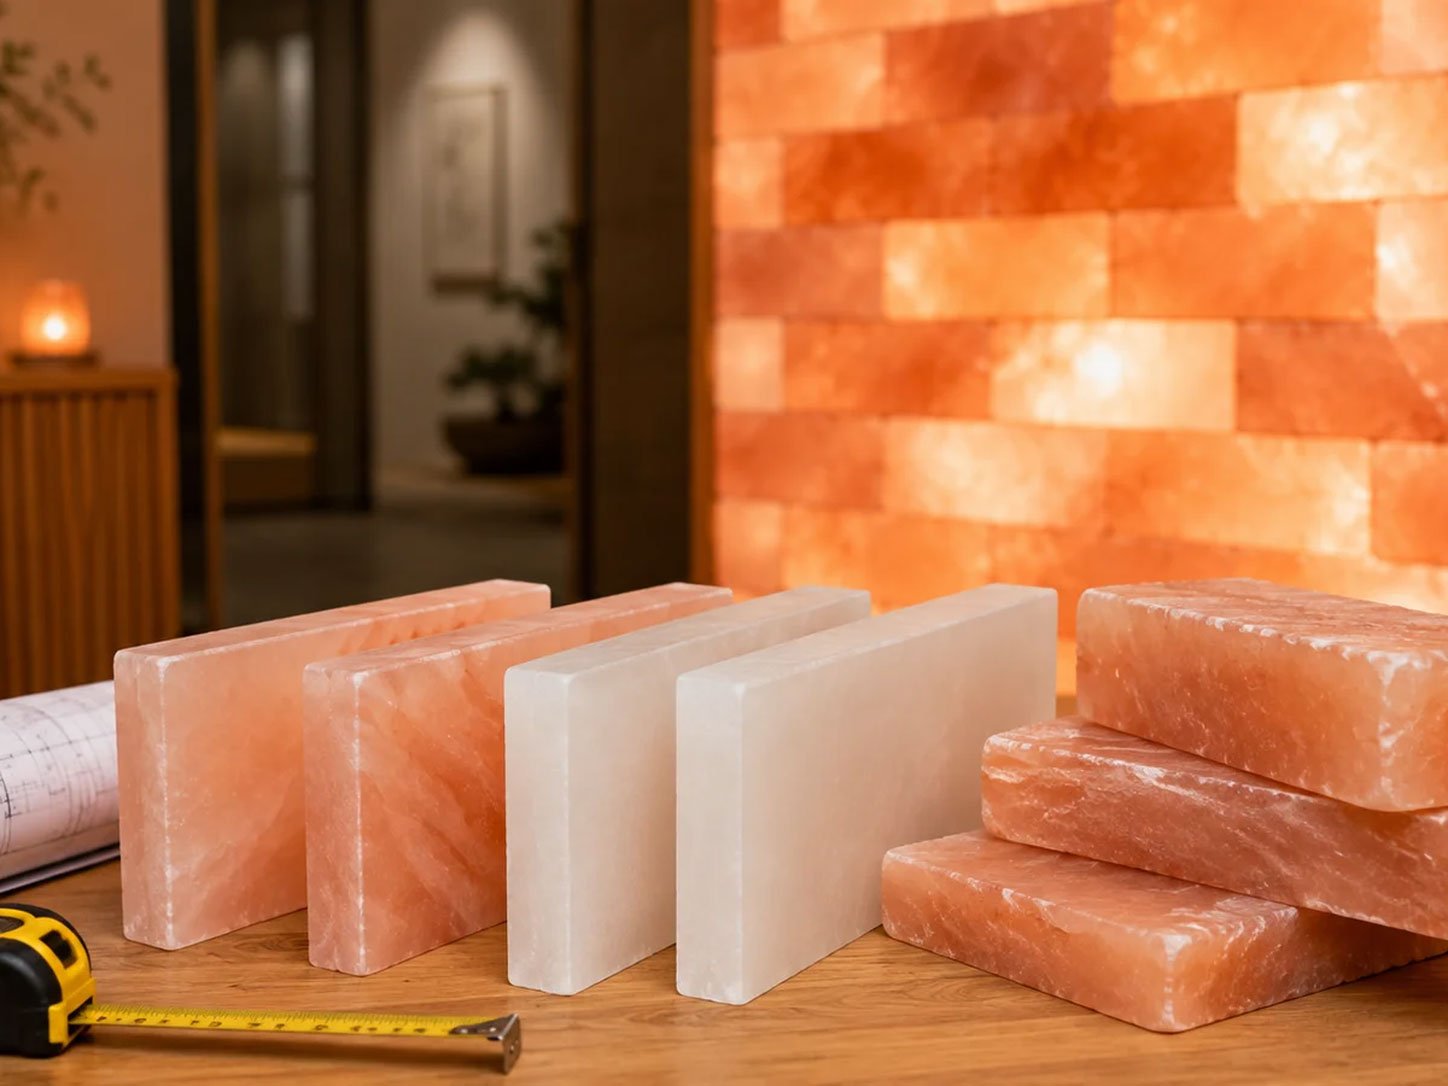
Choosing salt tiles and bricks for a wall project requires careful planning of size, thickness, color, weight, lighting, and installation.
Himalayan salt walls can add natural texture, warm color, and a distinctive appearance to residential and commercial interiors. They are commonly considered for spas, saunas, wellness centers, hotels, restaurants, reception areas, meditation rooms, and decorative home spaces.
However, customers often feel confused when choosing between salt tiles and salt bricks. They may look similar in photographs, but their thickness, weight, installation requirements, and final appearance can be different.
Before placing an order, it is important to understand the size of the material, calculate the required quantity, evaluate the installation surface, and plan the lighting and moisture control. This guide explains the main factors that can help you choose suitable Himalayan salt tiles and bricks for your wall project.
Understand the Difference Between Salt Tiles and Salt Bricks
The main difference between Himalayan salt tiles and bricks is usually their thickness.
Himalayan Salt Tiles
A commonly used Himalayan salt tile size is:
8 × 4 × 1 inches
Salt tiles have a rectangular shape and a thinner profile. They are often selected for decorative wall panels and backlit installations where customers want the natural appearance of salt without using an excessively thick material.
Salt tiles may be suitable for:
- Decorative feature walls
- Spa treatment rooms
- Wellness interiors
- Reception and waiting areas
- Meditation spaces
- Residential accent walls
- Backlit wall panels
Their thinner design can make them easier to use where the available wall depth is limited. However, they are still made from natural salt and can become heavy when installed over a large surface.
Himalayan Salt Bricks
A commonly used salt brick size is:
8 × 4 × 2 inches
Salt bricks have the same rectangular front shape as many tiles, but they are thicker and heavier. Their additional depth creates a more substantial appearance.
Salt bricks may be considered for:
- Large commercial salt walls
- Salt rooms
- Sauna design features
- Spa and wellness facilities
- Thick decorative wall sections
- Projects with reinforced framing
Because bricks weigh more than one-inch tiles, the support structure and installation method should be carefully planned.
Choose Between Pink and White Salt Tiles
Himalayan salt is a natural material, so every piece can have a slightly different shade, pattern, mineral line, or level of transparency.
Pink Himalayan Salt Tiles
Pink salt tiles may include natural shades such as:
- Soft pink
- Peach
- Orange
- Amber
- Rose
- Deeper reddish tones
Pink tiles are commonly chosen for warm and traditional salt-wall designs. When properly backlit, lighter and darker sections can create an attractive amber glow.
They often work well with wood, stone, dark finishes, and warm interior lighting.
White Himalayan Salt Tiles
Customers looking for a lighter and more contemporary appearance can explore our white Himalayan salt tiles in different pack quantities.
generally have lighter natural colors, including:
- Off-white
- Cream
- Pale beige
- Light pink
- Soft translucent tones
They can be a suitable choice for bright, contemporary, and minimalist interiors. Backlighting may create a lighter and cleaner appearance compared with darker pink salt pieces.
Customers should understand that natural white salt tiles may still contain small pink, cream, or mineral-colored areas. These variations are normal and help make every installation unique.
Choosing Salt Tiles and Bricks for Different Wall Projects
Choosing salt tiles and bricks depends on the size, design, and purpose of the project. One-inch salt tiles are generally suitable for thinner decorative panels and backlit feature walls, while two-inch salt bricks provide greater depth and a heavier, more substantial appearance.
For residential accent walls, customers may prefer thinner tiles because they require less wall depth. Spas, saunas, salt rooms, and large commercial interiors may use tiles or thicker bricks depending on the supporting structure, lighting design, and installation plan.
Before selecting either option, consider the total wall weight, available space, required coverage, humidity level, framing, and maintenance access.
Measure the Wall Before Ordering
Choosing salt tiles and bricks becomes easier when the total wall area and required quantity are calculated before ordering.
Accurate measurements are necessary before deciding how many tiles or bricks to purchase.
Use this basic formula:
Wall width × Wall height = Total square footage
For example, a wall measuring 10 feet wide and 8 feet high has an area of:
10 × 8 = 80 square feet
An 8 × 4-inch tile or brick has a front-face coverage of approximately 0.22 square feet.
Approximate coverage is:
| Quantity | Approximate coverage |
|---|---|
| 10 pieces | 2.22 sq. ft. |
| 20 pieces | 4.44 sq. ft. |
| 30 pieces | 6.67 sq. ft. |
| 50 pieces | 11.11 sq. ft. |
| 100 pieces | 22.22 sq. ft. |
| 200 pieces | 44.44 sq. ft. |
| 500 pieces | 111.11 sq. ft. |
The final quantity may vary because of the installation pattern, spacing, framing, cutting, edge finishing, and damaged or replacement pieces.
For many projects, ordering approximately 5% to 10% extra material can be helpful. Extra pieces may be needed for cutting, color balancing, accidental damage, or future replacement.
Consider the Total Wall Weight
Salt tiles and bricks are natural stone products. A few pieces may feel manageable, but a complete wall can become very heavy.
Before installation, consider:
- The condition of the existing wall
- The strength of the supporting frame
- The total number of tiles or bricks
- The material thickness
- The selected adhesive
- Mechanical supports or retaining channels
- Local building requirements
A large salt wall should not be attached to weak drywall without evaluating its load-bearing capacity.
Commercial projects and large residential installations should be reviewed by an experienced contractor or installer.
Plan the Backlighting in Advance
For additional electrical safety information, review the Electrical Safety Foundation International’s electrical safety guidance before planning wall lighting.
Backlighting is one of the main features that makes a Himalayan salt wall visually attractive. LED lighting installed behind the salt highlights the natural crystal patterns and different color tones.
Lighting should be planned before permanently installing the tiles or bricks.
For a balanced result:
- Space LED lights evenly behind the wall.
- Avoid placing all lights in one small area.
- Leave suitable space between the lights and salt pieces.
- Test several tiles before finishing the complete wall.
- Keep electrical connections accessible for maintenance.
- Use electrical components suitable for the room.
- Ask a qualified electrician to handle wiring when necessary.
Warm lighting often creates a traditional amber glow, while adjustable LEDs offer more flexibility.
Poorly spaced lighting can create bright spots and dark areas, so testing the arrangement before installation is important.
Prepare the Installation Surface
The supporting surface should be clean, dry, stable, level, and suitable for the total material weight.
Remove:
- Dust
- Loose paint
- Oil
- Moisture
- Weak surface material
- Construction debris
Depending on the project, the installation may require:
- Salt-wall adhesive
- Wooden or metal framing
- Back panels
- Retaining channels
- Edge supports
- Mechanical reinforcement
Small decorative panels may need a simpler system, while large walls usually require stronger structural support.
Select a Suitable Adhesive
Ordinary household glue should not automatically be used for Himalayan salt tiles.
The selected adhesive should be suitable for:
- Natural salt material
- Tile or brick weight
- The supporting surface
- Interior temperature
- Room humidity
- The intended installation method
Always follow the adhesive manufacturer’s instructions regarding surface preparation, application thickness, curing time, and safety.
The wall should not be disturbed or placed under pressure before the adhesive has fully cured.
Think About Humidity and Direct Water Exposure
Salt naturally interacts with moisture in the surrounding air. This is especially important in saunas, spas, bathrooms, and other humid environments.
Before installing a salt wall, evaluate:
- Average room humidity
- Ventilation
- Condensation
- Temperature changes
- Direct water exposure
- Distance from steam outlets
- Distance from showers or water sources
Salt pieces should not remain under continuous direct water exposure.
A sauna or spa project may require proper ventilation, moisture management, reinforced framing, and professional installation planning.
Arrange the Tiles Before Installation
Do not install every tile directly from one box without first checking its color.
Open the packages and arrange the pieces on the floor or another clean, dry surface. Mix lighter and darker pieces throughout the planned wall.
This helps prevent:
- All dark tiles appearing in one area
- All white tiles appearing together
- Uneven color distribution
- An unbalanced final design
Natural variation is not necessarily a defect. Differences in shade, crystal texture, mineral lines, and transparency are part of the character of Himalayan salt.
Plan for Shipping and Delivery
Himalayan salt tiles and bricks are heavy and can also be fragile during transportation.
Small quantities may be shipped through a standard parcel service, while large orders may require freight delivery.
Before ordering a large quantity, confirm:
- Total number of pieces
- Approximate shipment weight
- Residential or commercial delivery address
- Delivery vehicle access
- Liftgate requirements
- Unloading arrangements
- Inspection procedure
- Storage space before installation
Inspect the shipment when it arrives. Take photographs of any visible external damage before moving or unpacking the order.
Store the material in a dry and protected area until installation begins.
Maintain the Salt Wall Carefully
Himalayan salt walls generally require simple maintenance, but water and harsh cleaning products should be avoided.
Recommended care includes:
- Remove dust using a clean, dry cloth.
- Avoid washing the wall with water.
- Keep direct water spray away from the salt.
- Maintain suitable room ventilation.
- Inspect the support system periodically.
- Check the lighting safely.
- Replace damaged pieces when necessary.
Do not apply chemical cleaners unless they have been specifically approved for use on natural salt material.
Final Checklist Before Placing an Order
Before selecting Himalayan salt tiles or bricks, confirm that:
- The wall width and height have been measured.
- The required quantity has been calculated.
- Additional pieces have been included.
- The correct thickness has been selected.
- Pink or white salt has been chosen.
- The supporting surface can handle the weight.
- Lighting has been planned and tested.
- Suitable adhesive or framing has been selected.
- Humidity and ventilation have been considered.
- Shipping and unloading arrangements are ready.
- Professional installation has been considered for a large project.